


In late 2020, Databricks introduced Databricks Labs a collection of Terraform Providers that gives you the ability to deploy nearly all Databricks resources onto Azure and Amazon Web Services (AWS) cloud platforms.
Meaning you can deploy Databricks workspace, clusters, secrets, libraries, notebooks and automated jobs (and many more) at the time of provisioning the infrastructure, making it easy to manage and configure Databricks.
This post will focus on Azure cloud platform but the concept is similar for AWS.
Assumption
I’m going to make the following assumptions:
- You have basic understanding of Terraform components like Input Variable (.tf), Variable Definitions (.tfvars), Output files and Backend-Config.
- You have basic understanding of Databricks components, like Workspace, Clusters, Token, Scopes.
Let’s get started.
Create Terraform Main.tf file
You need to create a terraform main.tf file, then we can start adding content to it.
First add the providers, both azurerm and databrickslabs is needed as required_providers.
Then configure each provider, the databricks provider requires 'databricks_workspace.id' to be defined.
Next, you need to add the resource group. We will use variables that are defined in the variable definitions (.tfvars) file.
Now you can start adding Databricks resources, firstly let's add Databricks workspace.
Now add Databricks secret scope to the workspace and generate a personal access token (pat) for 1 hour then store as a secret in the scope.
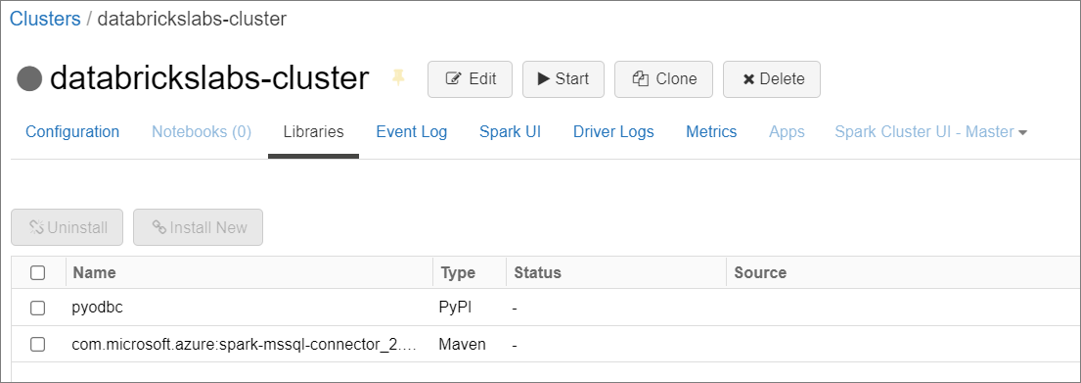
Next add a Databricks cluster and configure the libraries to include some packages.
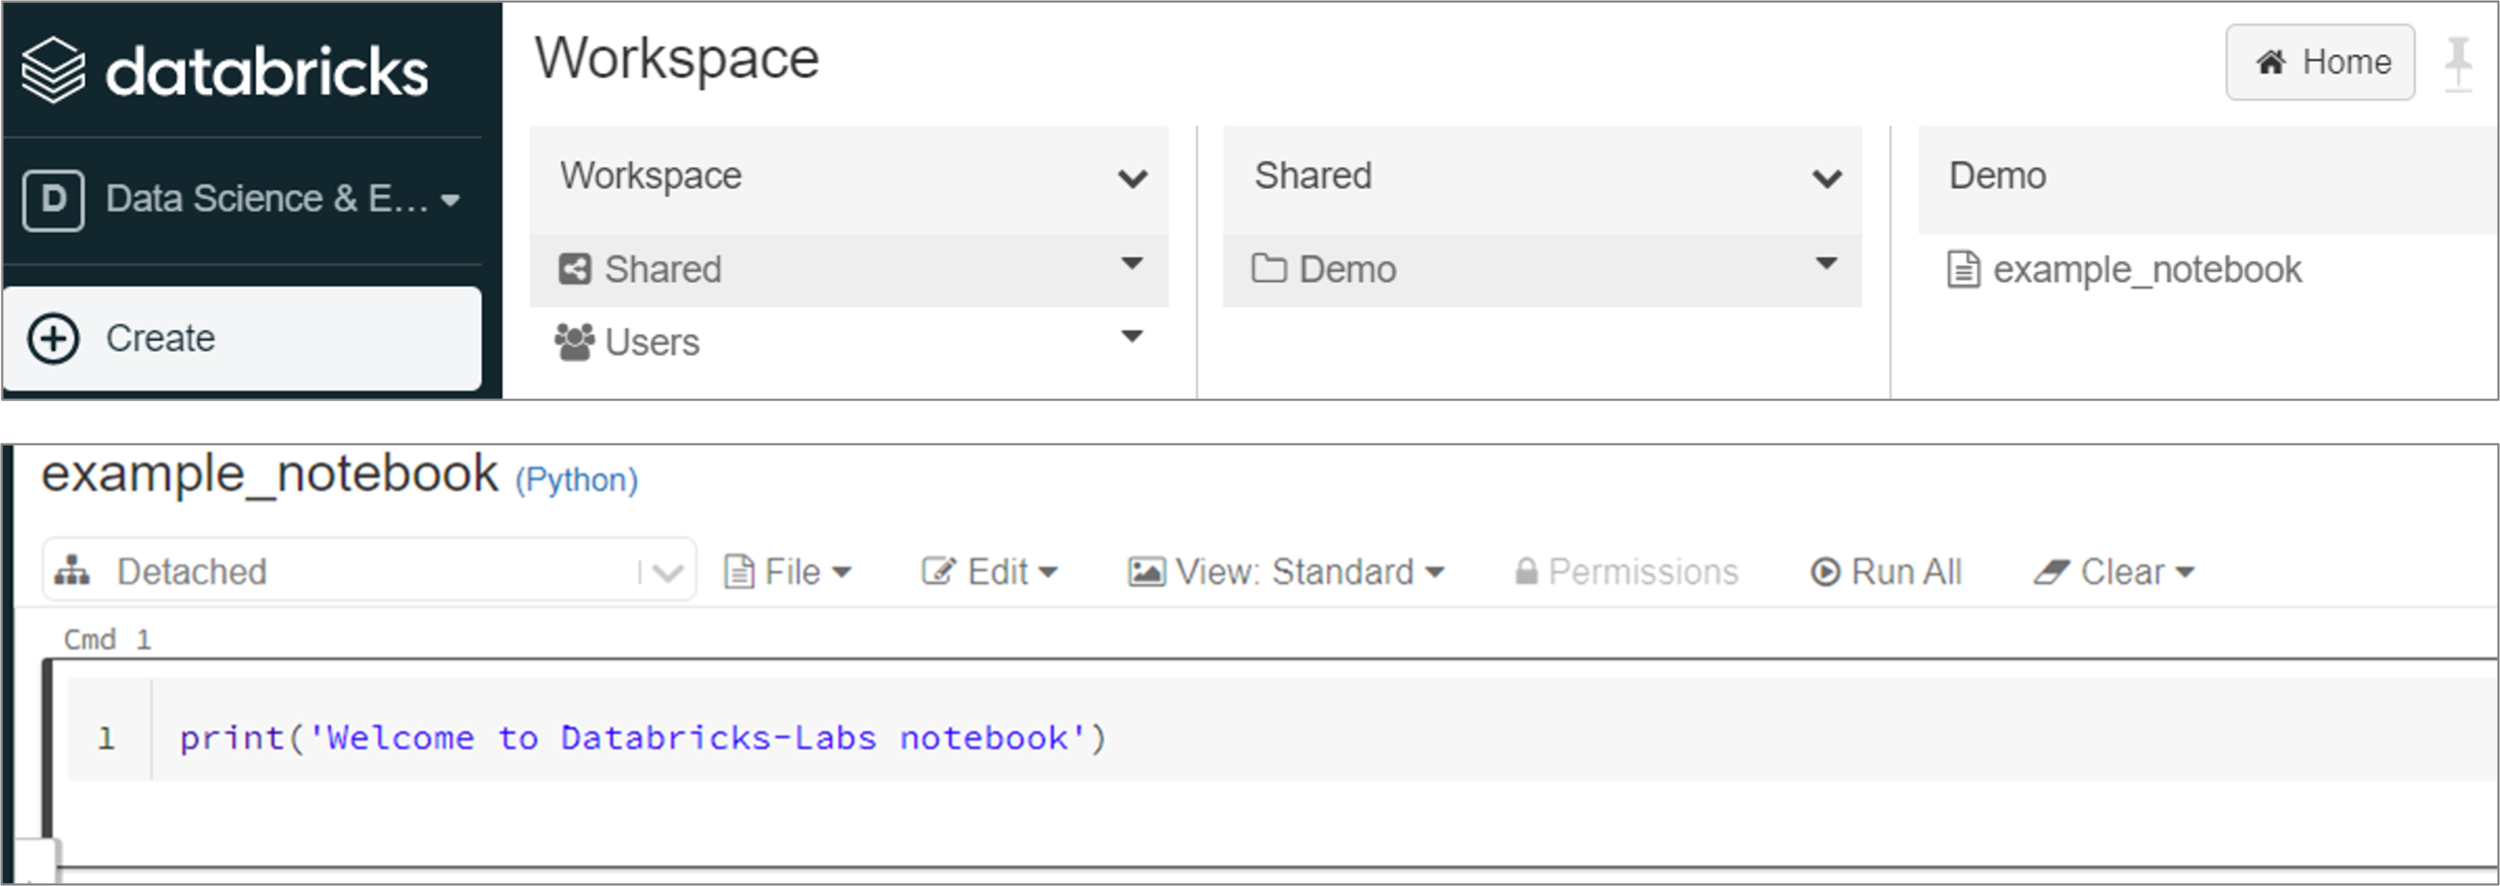
You can load notebooks directly to workspace when using Terraform, so let’s create and load a simple notebook using content_base64 and language attributes. The path is location of where the notebook will be stored, this is defined in the variable definitions (.tfvars) file.
Finally, you need to define the backend configuration for where the Terraform state file will be stored. This is optional if you are doing it locally for testing purposes.
Other Terraform files
You will need to create the variables.tf and output.tf (optional) files. I will not specify how to create these files but they will be available on GitHub.
Create Terraform Variable Definitions (.tfvars) file
You need to create a terraform-dblabs.tfvars file, then we can start adding content to it. The variable definitions (.tfvars) file will contain the values for the variables you defined in main.tf file.
First add the backend configuration values for the Terraform state file storage and Azure resource.
Then add the variable values for the Databricks content.
Execute Terraform Project
Now that the resources and Terraform files have been defined you can deploy the resources.
Login to Azure
Login into Azure using the Azure CLI and set the subscription of where you are deploying.
Terraform Init
Initialize the project using Terraform Init command which will downloads all of the required components for Azure and Databricks.
Terraform Plan
Now, execute the Terraform Plan command to see what will be created.
Terraform Apply
The plan shows there will be seven resources created, which is correct. So let's execute it using the Terraform Apply command, you may be prompted to confirm the action if so then enter yes.
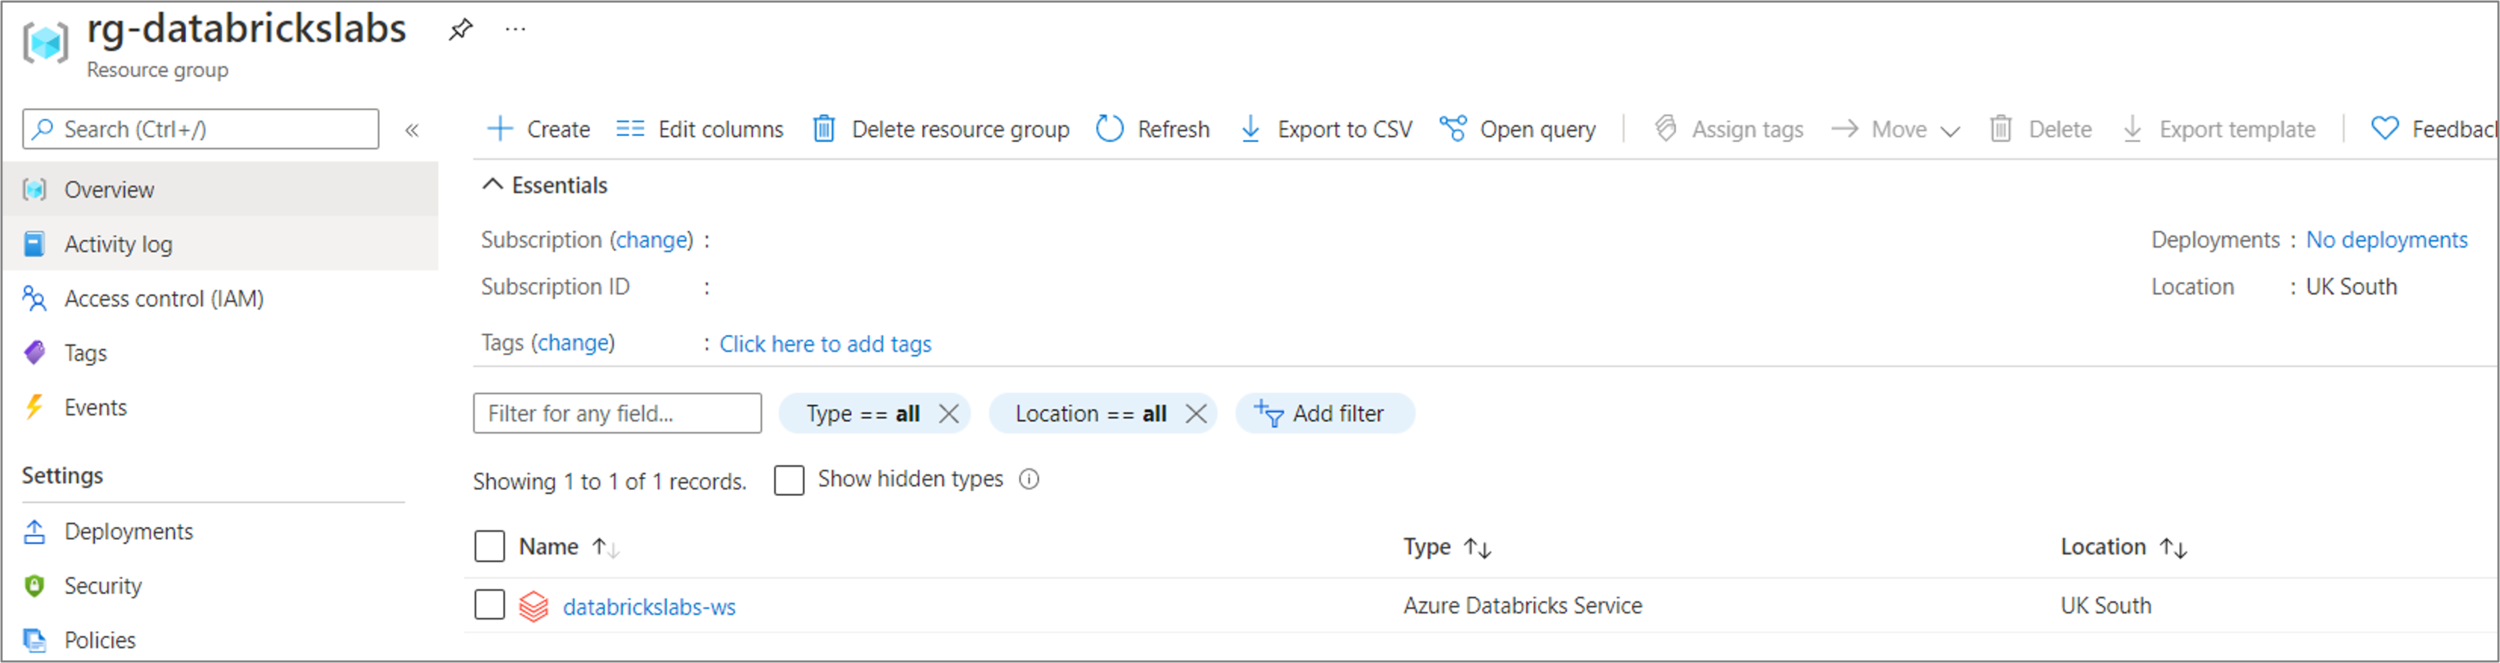
Review the Azure Databricks Resource
Lets see the result of the Terraform execution.
Azure Resource
Cluster and Libraries
Personal Access Token for 1 hour

Sample Notebook
Summary
This post is intended to give you a flavour of what Databricks Labs provider can do in Terraform.
We defined and deployed Azure resources and several Databricks components using Terraform. Prior to Terraform Databricks Labs provider we would have had to create these Databricks components using a mix of ARM templates, JSON files and the Terraform Azure providers or just manually in Databricks.
The Databricks Labs provider has reduce this approach and made it easier to read, manage and maintain by giving us the ability to provisioning these when the infrastructure is set up.
Thanks for reading, I hope you found this post useful and helpful.
All code files can be found on GitHub.